Millions of people have achieved independence and launched their own online businesses thanks to Shopify. This e-commerce company operates in over 175 countries and provides everything you need to start selling and growing.
Want to start your freelance business in the digital world? Learn in this post how to create your Shopify store from scratch.
How to Create a Store on Shopify: Step-by-Step Guide
Shopify: What Is It and How Does It Work?
It’s a digital tool designed to let you sell online without complications. And it’s not limited to a single user profile—Shopify is ideal for freelancers, content creators, small businesses, entrepreneurs and solopreneurs.
How does it work?
Shopify brings together everything you need to launch and manage each part of your digital business—from store design and product uploads to order and payment management.
And since it’s cloud-based, you can manage your business from anywhere in the world as long as you have an internet connection.
Why Choose Shopify to Create Your Online Store?
There are many reasons, here are some of them:
1. It adapts to all types of commerce
Today, people sell in multiple ways: online, through social media, in physical stores, or even via apps. That’s something Shopify understands well, which is why it offers a flexible platform that adapts to all these scenarios.
It doesn’t matter if you’re a developer, designer, influencer, or someone with a good product or service.
2. It offers customization options
Shopify gives you the freedom to design an online store that looks and feels like your personal brand. You can also choose from hundreds of professional templates and adapt them to your style.
Customization covers everything from design to the shopping experience. You can choose themes, edit colors and fonts, add videos, carousels, and more.
The goal is to tell your story and make your brand feel authentic and professional to connect with your customers.
3. Multiple sales channels
Another reason: you can sell through your website and other platforms. Whether it’s social media, marketplaces, or even in person if you set up a physical point of sale.
The best part? Everything stays synced.
4. Integrations that expand your reach
The site connects with a wide range of tools, apps, and services through its integration ecosystem.
Some are native, like Shopify Email, while others are third-party tools like Mailchimp or Meta Ads. This way, you can automate tasks and save time.
5. Simplicity that removes chaos
Whether you’re building a free or paid online store, you have to juggle many tasks at the start. But Shopify simplifies things by bringing everything into one dashboard: sales, shipping, payments, design, customer service, and more.
You have a complete set of tools available, and you decide which to use and when to activate them.
6. You’ll grow at your own pace
No matter the size or stage of your project—whether you're just starting out or already have a solid foundation—the platform adapts to your situation and supports you throughout the process.
As your store evolves, you can add features, connect new tools, and expand without needing a new solution.
Step-by-Step Guide: How to Create Your Online Store on Shopify from Scratch
Shopify could be just what you need to make money online. It’s a flexible, secure solution designed to grow with you.
But how do you actually create a store on Shopify?
Pay close attention to the following steps:
1. Find a Profitable Idea and In-Demand Products
Before creating your store, you need an idea with real market potential. Whether you design your own products, resell, or work with dropshipping, your first challenge is to identify products with demand and profit margin.
Do you have a hobby or experience in a specific area? Start there.
You can also:
Explore common problems you could solve
Identify gaps or areas for improvement in everyday products
Research what’s trending on social media and marketplaces
Just make sure the products have long-term potential.
2. Define Your Ideal Audience
Knowing who you’re selling to is as important as knowing what you're offering. Every business should target a specific group of people.
To do this, evaluate at least the following:
Age
Location
Interests
Lifestyle
Buying habits
It’s not just about segmenting—it’s about understanding what motivates your potential customers.
3. Choose a Legal Structure to Operate Your Store
Before selling, you need to define how you’ll register your business with the Mexican tax authority (SAT). As a freelancer or solopreneur in Mexico, you can choose to:
Register as an individual with business activity.
Register as a legal entity, if your project grows or you have partners.
If you do it as a legal entity, you must choose one of the types of corporations. This will allow you to operate your online store in Mexico legally, as well as access to greater growth opportunities.
4. Design a Brand with Its Own Identity
Now comes the creative part.
This step will shape how your customers perceive you—don’t take it lightly. You’re building your brand’s image. If done well, it will express your purpose, style, and credibility at first glance.
Key elements include:
Values and purpose. Define what makes you different and what experience you want to offer.
Name. Choose a name that’s memorable, easy to pronounce, and represents your brand. If you’re stuck, Shopify offers a domain name generator.
Logo. This is your visual signature—consider hiring a designer if you want something professional.
Product photos. Images have the power to attract, so they must be crystal-clear. You don’t need a studio—a good smartphone will do if you pay attention to lighting and framing.
Everything must be aligned with your brand’s style.
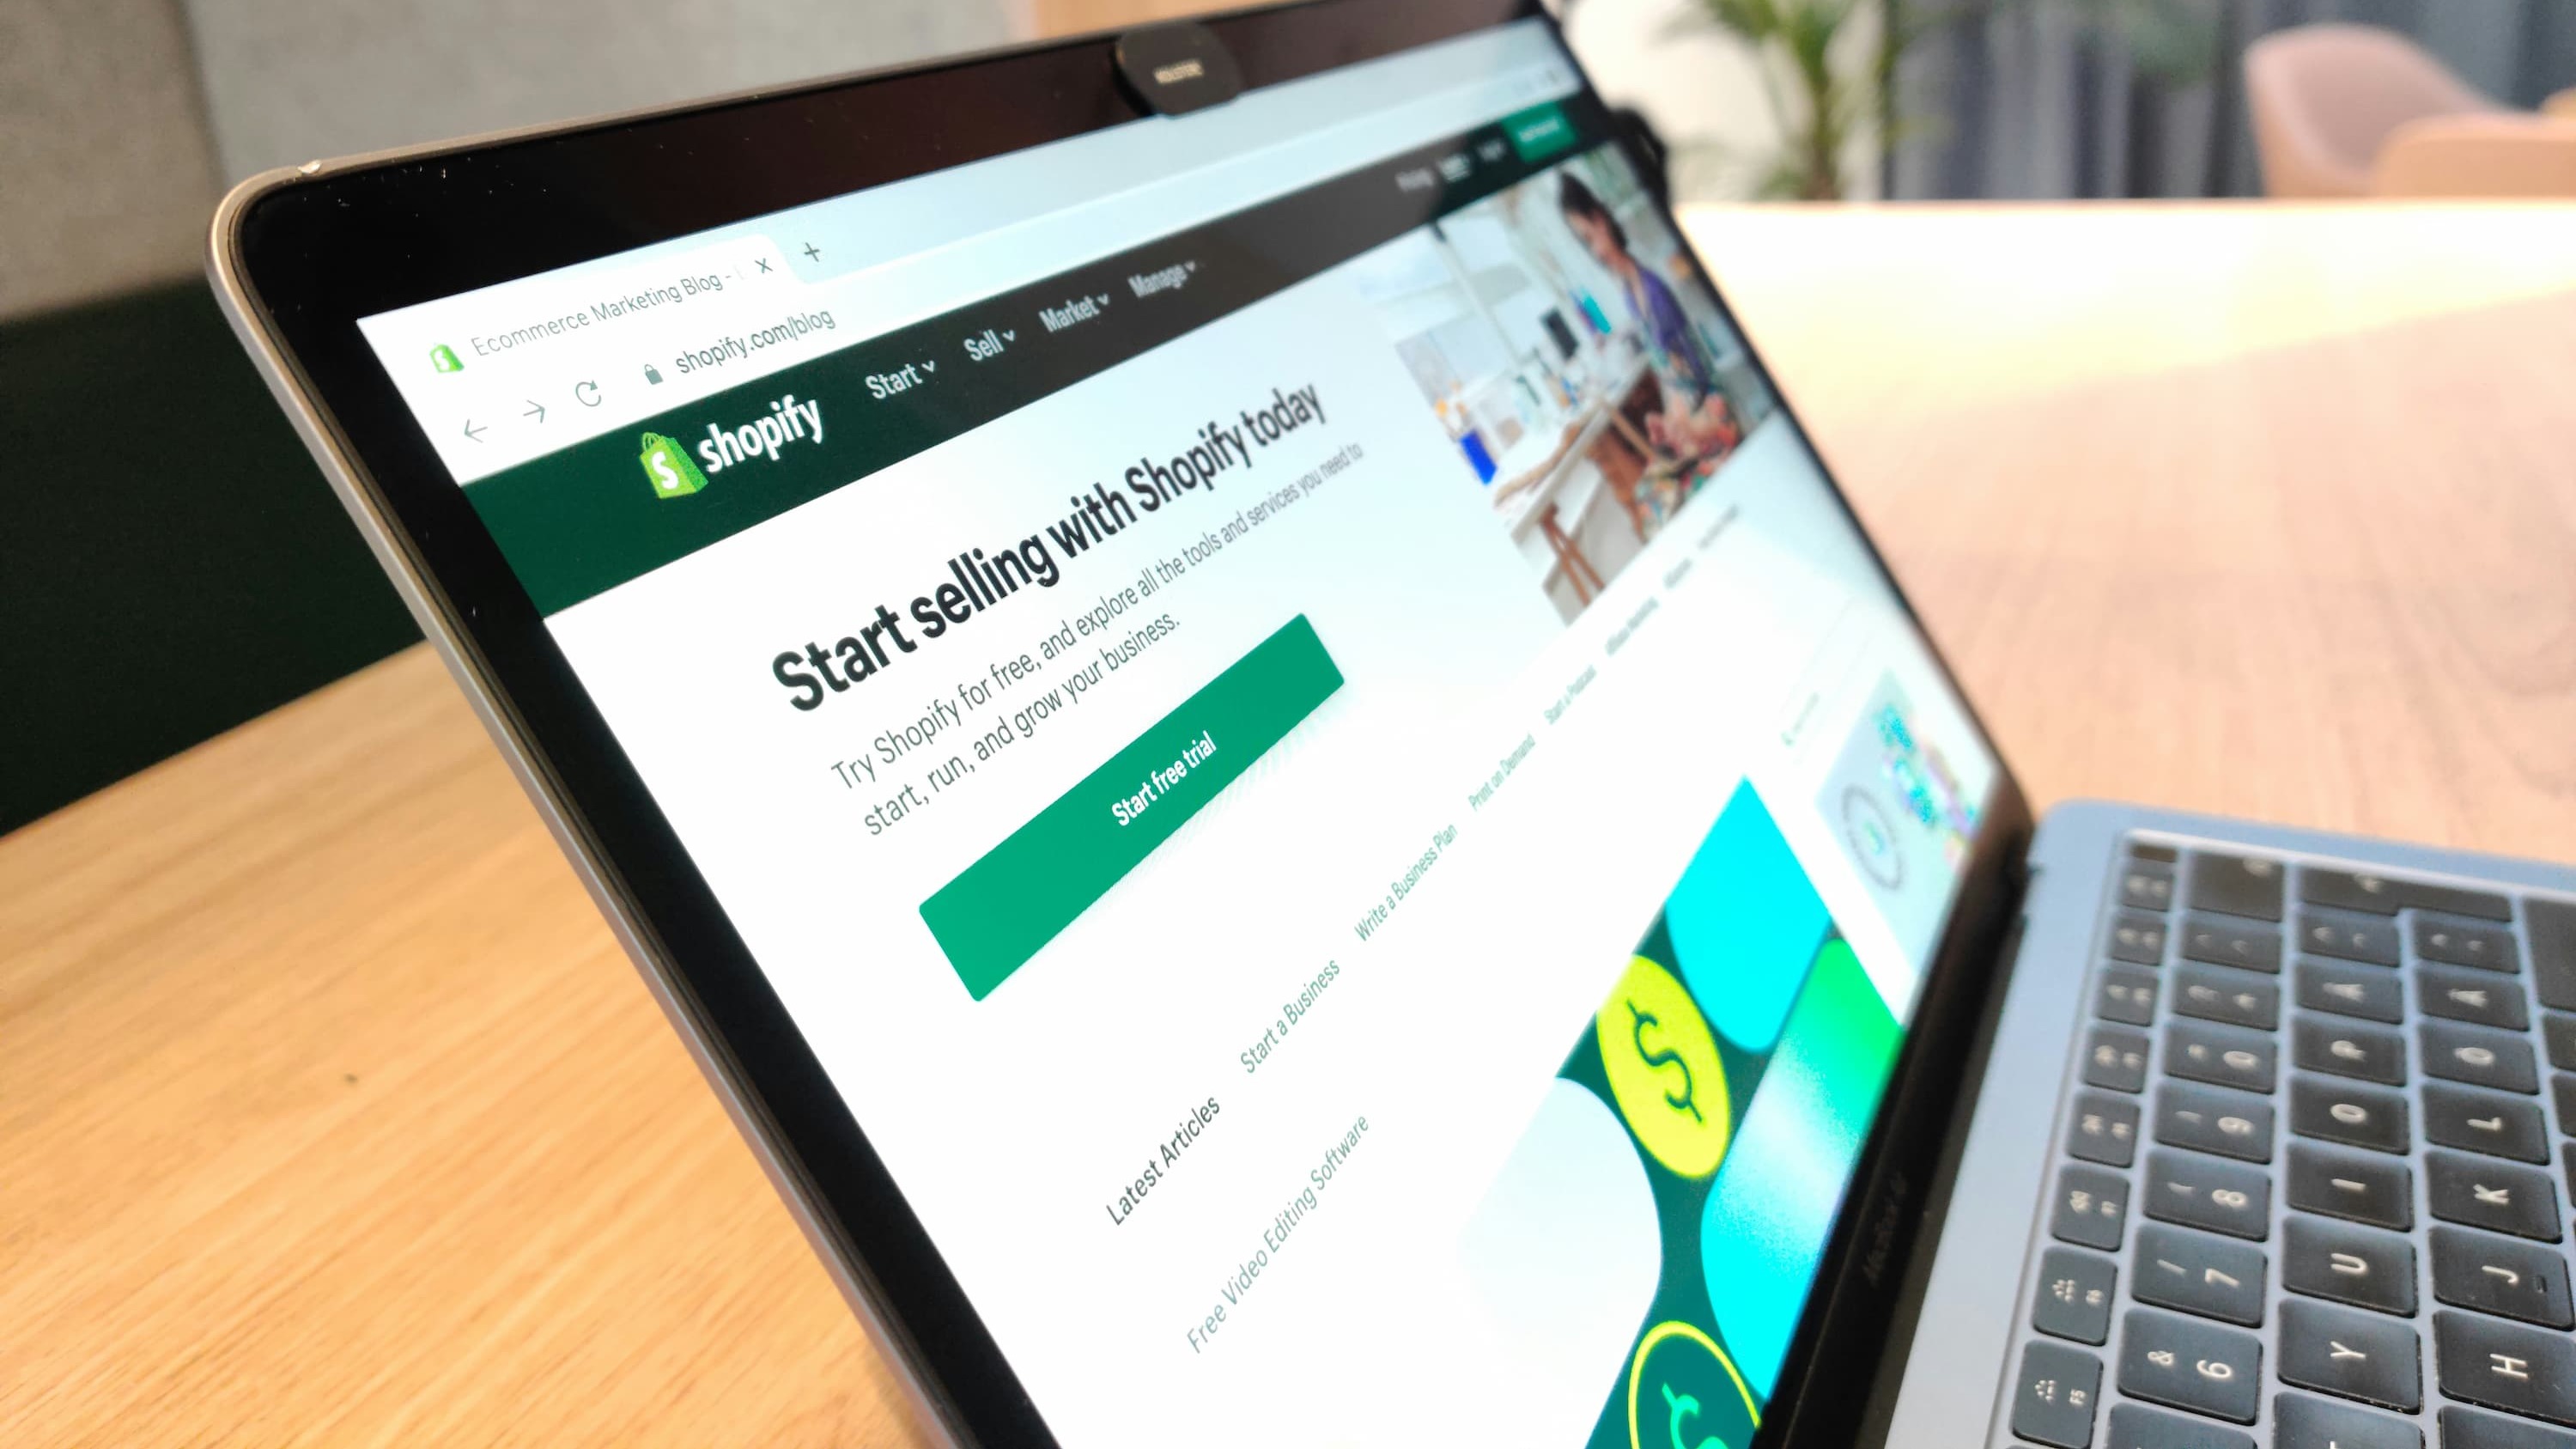
5. Sign Up and Access Your Shopify Dashboard
So, how do you create a store on Shopify?
To get started, go to shopify.com and click on “Log In > Start” at the bottom to open your account. You can sign up with an email, Facebook, Apple, or Google.
You can also create your online store for free with the no-cost version by clicking the “Start Free Trial” button at the top right. Here, you’ll see a series of quick questions to personalize your experience, including:
How would you like to sell? (Online store, social media, marketplaces, physical store, etc.)
What best describes you? (If you're already selling or if it’s your first time)
What do you plan to sell? (Physical products, digital items, dropshipping, services, etc.)
If you don’t want to answer, you can skip this part and continue the sign-up process, where you'll enter your email, password, and store name.
After that, Shopify will ask for some information about your business and tax address. But if you started with the free trial, you won’t need to enter any payment method. You’ll have 3 days to set up your store without entering billing details.
Set up your tax address. Although you don’t need to provide payment information at this stage, it’s important to set up your tax details for billing and compliance purposes.
Access your store’s dashboard. Once you complete the previous steps, you’ll be taken to your Shopify store’s admin dashboard.
From here, you’ll need to choose one of Shopify’s plans to start customizing your store.
6. Add Your Products
You can now start uploading your first product by adding a title, description, and including images or multimedia.
You’ll also find fields for:
Price: What the customer pays
Compare at price: For showing a discount (original price)
Cost per item: Your own cost (not shown to customers, but helps you calculate margin)
In the inventory section:
SKU: Internal code you assign
Barcode: Optional, but helpful if you plan to sell on marketplaces like Amazon or use Google Shopping tools
In the shipping section, you can:
Mark whether the product is physical
Enter the weight to calculate shipping rates
Add the country of origin and HS code (for customs)
If you sell the same product in different sizes, colors, or styles, there’s a space to add these variants. You can assign different prices and SKUs to each.
7. Optimize SEO and Manage Products in Bulk
Once your products are uploaded, it’s time to improve their visibility on Google. If you didn’t include your brand name in the product title, you can still add it in the SEO section to boost your search ranking.
You can also upload multiple products at once using a CSV file—just select the “Import” option.
8. Adjust Your Store’s Basic Settings
Go to Settings in your Shopify dashboard to customize key aspects of your store before you start selling.
Important sections include:
General: Set your store name, contact email, tax address, time zone, units of measurement, and currency
Users and permissions: Give team members access based on their roles
Sales channels: Activate other channels (Facebook, Google Shopping, Instagram, etc.) to expand beyond your online store
Plan and billing: Review or change your plan and manage payment methods for your Shopify subscription
Payments and checkout: Enable payment methods like cards or manual payments. Decide if customers need to create an account or can check out as guests
In this section, you can include custom instructions—such as payment through DolarApp. Note: this must be arranged outside Shopify’s platform.
Spend a few minutes on these settings to build a solid foundation and save time later.
9. Customize Your Store’s Appearance
In the “Online Store” section, you’ll find key areas to shape the user experience:
Themes
Blogs
Pages
Navigation
Domains and Preferences
10. Add Extra Features with Apps
Shopify has a comprehensive App Store to expand your store’s capabilities. From marketing to shipping management, you’ll find tools for almost everything.
Just go to the “Apps” option in the side menu and search for what you need.
Some useful categories include:
Email capture pop-ups
Shipping and logistics (like Sendcloud or Packlink)
SEO and analytics
Abandoned cart recovery
Integration with WhatsApp, Mailchimp, or Google Ads.
Before making your store public, make sure everything is ready to receive visitors and orders.
It’s worth noting that while your store is in trial mode or under construction, it’s password protected—even if you already chose a plan.
To make it visible to the public, go to Online Store > Preferences and disable the password. Only then will your customers be able to visit and make purchases.
Frequently Asked Questions
How much does Shopify cost?
Prices range from $14 (Basic plan) to $2,300/month (Plus plan) when billed annually. Shopify also offers $5 and $89/month options and a customizable enterprise solution.
What can I sell on Shopify?
Shopify supports nearly any type of business, digital or physical. You can sell physical items, services, digital downloads, memberships, online courses, or dropshipping products.
Can I create an online store for free?
Yes, you can create an online store for free with Shopify using the 3-day trial. After that, you’ll need to choose a paid plan to continue selling and customizing your store.
Descubra um mundo sem fronteiras.
Os países têm fronteiras. Suas finanças, não mais.
 Freelancer tips